|
I sniffed my kid's head too many times in the last few days, and I've caught the 'nostalgia'. It's akin to the black plague if you're a drama queen like me because once you catch this virus you can't really get anything done. I keep staring at Vale like she's going to change and I'm going to miss it. She has Farrah Fawcett hair today, and she didn't last week. What else is going to happen? Glitter poo or an eleventh toe? Neither one is good if you've ever had to clean glitter off of stuff. Another toe would make shopping a bummer.
Something about Easter, and a brief Jesus Conversation with my dad left me thinking about how truly bad and sh**ty (yes, bad and sh**ty) we all are for thinking anything we do, outside of loving each other, really matters. If you've ever watched any rom-com EVER then you know that the futility of life exists so we can appreciate moments. Nicholas Sparks wouldn't lie to us, people. And the Outerbanks is beautiful. I'm trying to be a better human and live for the 'right now' moments instead of living for the future. Future- living is what convinced me to spend a house-on-the-Gulf bucket of money on a private school education and then spat me out into a workforce with a mafioso-type "pay me now, please" arrangement that I couldn't fulfill. Guess how much of that education I'm using hammering nails and cleaning very old dirt off of stuff? Tangent over, and back to my point: I don't want to spend all of my time planning for my funky Bunny's future and miss out on her nowness. So today's post isn't about work; today's post is about my kid, and what a wack-job she is. My kid is currently out cold in her crib wearing her sandals. She's been there since 6:30 pm (it's now nearly 8:00 pm) and won't wake up tomorrow until between 7:14 and 7:37 am. She takes two hour long naps in the middle of the day and that is the reason I can get work done. It's like she knows I need to, which I find both creepy and awesome. We play a game where I fill my cheeks up with air and she punches them with her fists over and over while I make fart noises until all of the air is gone. It's pretty rad, and I'm happy she catches on when I try to start these traditions. She loves watching Frozen (I need to drink coffee) and when Elsa 'let's it go' Vale mimics her and raises her arms up to help her melt the snow. She's a great helper. She eats more food than I do, by a lot. We're talking burritos, fish of any variety, anything Italian, quinoa, kale, radishes, avocados... Do I need to list anymore weird, kid unfriendly foods or do you get the picture? Little homie loves a variety, and I love that we can sit and share the same meal without me having to turn her broccoli into a flying saucer on an acid trip. She loves making scary faces like she's demon possessed (swelling with pride, because I taught her), roaring like a lion, and making choking noises while she's eating. It's super entertaining when we're out in public. Her best friend is her cousin, Casen. One day we're going to have to tell them that they can't roll around on the floor kissing and hugging each other but not before we have enough video/audio proof to torture them with in high school. Her second best friend is our dog, Dougie. It takes a special kind of weirdo to love that dog, and it makes me love her even more to know that she can be sweet and affectionate to an animal that howls at the moon tries to kill anyone who comes near me. One time on an airplane she was fussing for snack (after a six hour delay she was the best behaved soul on board), so I broke the cardinal rule of clean-eating and gave her poisonous Cheerios. She didn't make a noise, except "mmmmmmmm" for 2.5 hours. So now every day, twice a day, she eats Ancient Grain O's: because I care about what goes in her body, but also I'm not an idiot. And coffee. Vale has the most contagious laugh you'll ever hear. She runs and hides in corners, and then starts hysterically laughing the second I say, "what are you doing?' She's so easy to impress. She loves creepy stuff. The more disturbing I can be, the harder she laughs. Breathless, hospitalization type of laughs are always my goal. We play a lot of "zombie" where I rise from the dead and eat her alive, or "soccer" which my neighbor Alex says is the most pathetic thing he's ever seen. Alex is 86, and he's not joking around. I love him, and I'm not joking either. She's really into stuffed animals right now. She hugs them really tightly, and then body slams them to the ground Sleeping with the Enemy style. Those plushies are in danger, and I had the thought the other day that if Toy Story is real, she's going to be in for a pretty horrific surprise. She takes her little stuffed animals and makes them walk. While they walk she says, "Doe Doe Doe" with every step they take and makes a fish face. We play a lot of tea party. I bought her this adorable tea set from Land of Nod and she's become really great at pouring the tea, and sharing in the "nom nom nom" with mommy. Now that she's become adept at tea'ing she really wants to test her luck with my coffee. She waits patiently (grabs at it the whole time) until I'm done and then gets to hold the cup. I usually find it after she goes to bed in a shoe, or shoved inside the Velcro of one of her stuffed animal's butts. See what I mean? She loves taking long walks with her dog-bud, Doug. She sits in the stroller, with her purse or mustard (depends on her mood), and holds onto his leash while I try not to fall down in traffic or tip her over. We've got a rhythm, and we take two hour-long walks a day. Mommy gets to be one with nature, and baby gets to boss Dougie around while he tries to take a dump with two people watching and laughing. In our defense, he looks weird when he poops. She's a water rat and would spend every minute outside in or around water if I would let her. One day she'd be called 'ol leather skin by the neighborhood kids if she didn't love wearing over sized floppy hats so much. Looks like something out of Steel Magnolias especially if it's purse, and not mustard, day. I love my little bun so much, and I'm so happy she picked me. No one else gets me quite like she does, and I rely on her to make me feel good about myself. Also, she's very snugly and rarely a jerk so that helps with the unconditional part of parenting. Take a minute this week to think about how special you are to have been picked by your kids, or how amazing your moms are for helping you to let your freak flag fly properly. La vie en rose, little Bunny. xoxo If you liked this post, you'll love these posts about Thanksgiving and Christmas with Bunny. Don't forget to follow us on Facebook and Instagram <3
0 Comments
Most people who dumpster dive or go yardsalin' appreciate the beauty of an old piece of furniture, and/or they're super broke and sick of eating on the floor. You can only tell people you're adopting an eastern lifestyle for so long before they call bull sh*t. You can achieve just about any look you want with the right old piece of furniture, the right plan, and the right tools for the job.
I've done lazy makeovers before, and they end up looking like crap, or not lasting very long. The best way to end up with an inferior result, if that's your bag, is to do this: 1. not clean the furniture before starting 2. not properly prep the furniture 3. not use the right materials 4. not follow all the steps, no matter how frustrating they are 5. not properly seal your work I've talked about cleaning furniture a million times because it's so important. There is nothing worse than having old dirt and dust cause a lumpy paint job. Actually, that's an exaggeration. Hacking off a finger, chemically burning your skin, getting paint in your HAIR-- I'm sorry, too far-- is worse. No matter what you're doing to the furniture you want to prep it completely before you get going so there are no interruptions. Remove all of the hardware, strip the finish if you're staining, sand or prime for certain paints, patch holes or repair damages, etc. The five mistakes I listed above are all big ones, but having the right materials to do the job in the most efficient way, to render the best result, is the newest lesson I've learned. Here's a breakdown, in my opinion, of the right tools for each job (whether you're a beginner DIYer or a veteran). I'd love to know if anyone agrees, or to hear what you like better! We are a participant in the Amazon Services LLC Associates Program, an affiliate advertising program designed to provide a means for us to earn fees by linking to Amazon.com and affiliated sites. The right tool for the right job: 1. Chairs= spray paint. How many of you have hand painted chairs? I hate drips, I hate brush strokes, I hate spending extra time to get a worse result. I've painted chairs many different ways, and the cleanest result is with spray paint. There are a million different kinds and I find them easy to distress and antique also. ***UPDATE: after reading tons of reviews, I've decided to buy the Critter Siphon Gun. It's a spray attachment to be used with a compressor and mason jars for holding the paint. I will offer a full review, of my own, in a future post. I am so excited to try this baby out as I've been less-than-satisfied in the quality of paint coming from spray cans, and less-than-satisfied with the cleaning involved in a larger sprayer. 2. Fixtures= spray paint. Even if you want an aged look, you still need a base to work right, right? 3. Large, flat surfaces= cabinet roller. No matter what type of paint you use, even chalk paint, use the cabinet roller. People will tell you you waste too much paint with a roller, but it doesn't seem to me like one proper coat with a roller versus 6 coats with a paint brush is wasteful. Brush strokes are beautiful if you're dry brushing paint, or you want an incredibly rustic look; but, for a cleaner base use a roller every time. 4. Smaller tables, table bases= craft brush. If I'm applying paint to anything on the smaller side, that isn't insanely detailed, like a coffee table, side table, bistro, or table legs I use a brush. A cheap one. It's more zen, you don't have to worry about taping the crap out of the piece because chalk paint is very easy to work with (baby wipes will wipe up any mistakes) and you achieve a beautiful result. 5. Sanding= Mouse Sander. If I'm sanding any pieces of furniture, I either use my hand-held triangular sander, or my Mouse. It's an amazing tool that gets into the crevices without applying too much or too little pressure. You don't want to take forever sanding but you don't want to destroy the piece before you begin either. 6. Stain= foam brush and paper towels. I love using the throw-away foam brushes. I can dip the little guy one time in stain and basically cover the entire surface. I also get more than one use out of them, even though you're not supposed to. I prefer paper towels to wipe the stain off because the white rags everyone is always using leave lint in my finish, or get soaked through and destroyed. I'm not putting stain covered cloth in my washing machine and I'm not reusing a rock hard cloth either. I can be liberal with the paper towels and get every last bit of stain off most efficiently. 7. Nailhead= tack remover. Who is going to hammer in 100 tacks on a chair? I'm not. I pre-drill a hole (also a pain in the ass). To remove old upholstery tacks I use a tack remover. It looks like a little mini vagina on a stick and removes the tacks evenly so you don't accidentally bend them, or kill someone. 8. Antiquing= Glaze. Wax is lovely, but I prefer glaze when I'm antiquing. You can play with it for longer and it isn't sealing the piece while you're using it. There is an extra step involved but I'd rather have the ability to mess around with the material until I get it perfect. 9. Nooks and crannies= Spray paint. The only way to get in there without achieving a sloppy result. 10. Cleaning= dish soap. That's right, regular old dish soap with water and a couple of sponges. Forget all of the fancy wood cleaners unless you're cleaning a newly finished piece. Then you want to go with Mineral Spirits to remove excess stain, or Murphy OIl Soap for day-to-day maintenance. 11. Stripping= Citristrip, metal spatula, steel wool. Citristrip is the least harsh of the stripping chemicals and works wonderfully. A lot of people will tell you to use a plastic spatula to remove stain, varnish, chemicals, etc. That's a load of crap. You're not going to gouge up the wood if you're careful and use long, continuous movements. Steel wool is great for those trouble areas, but use a fine grade so you don't scratch up the wood. 12. Filling Holes= Kwikwood. This is by far my favorite product for repairs on anything. Workable for a long period of time, and very easy to use if you have a bit of patience. You want to make sure you get it as close to perfect before it dries as you can because it's easier to work with when soft. Once it's dry you need to sand it flat but it's considerably more work if you're sanding a mountain of hardened putty than a slightly raised area. 13. Polyurethane= brush. I like to lightly brush on my top coat whenever I can. The spray stuff leaves bubbles (even if you're very careful) but it's great for things like chairs, detailed areas, and touch ups. 14. Furniture Model= Valen. She really is the best furniture model around, and she's free. In fact, she volunteers to model for every one of my finished projects (she steps in front of the camera and becomes my model by default). I fully intend to make money off of her one day so I don't have to work. Furniture is my passion. Being lazy and rich is my super passion. Let me know if I've missed anything you're curious about, and share your favorite tools for the job in the comment section! I'm always interested in what works for other people. I'll probably still do everything my way, though. xoxo If you liked this post, you'll love these posts about decorating my dining room for free and stripping wood furniture! Also, don't forget to check us out on Facebook and Instagram <3
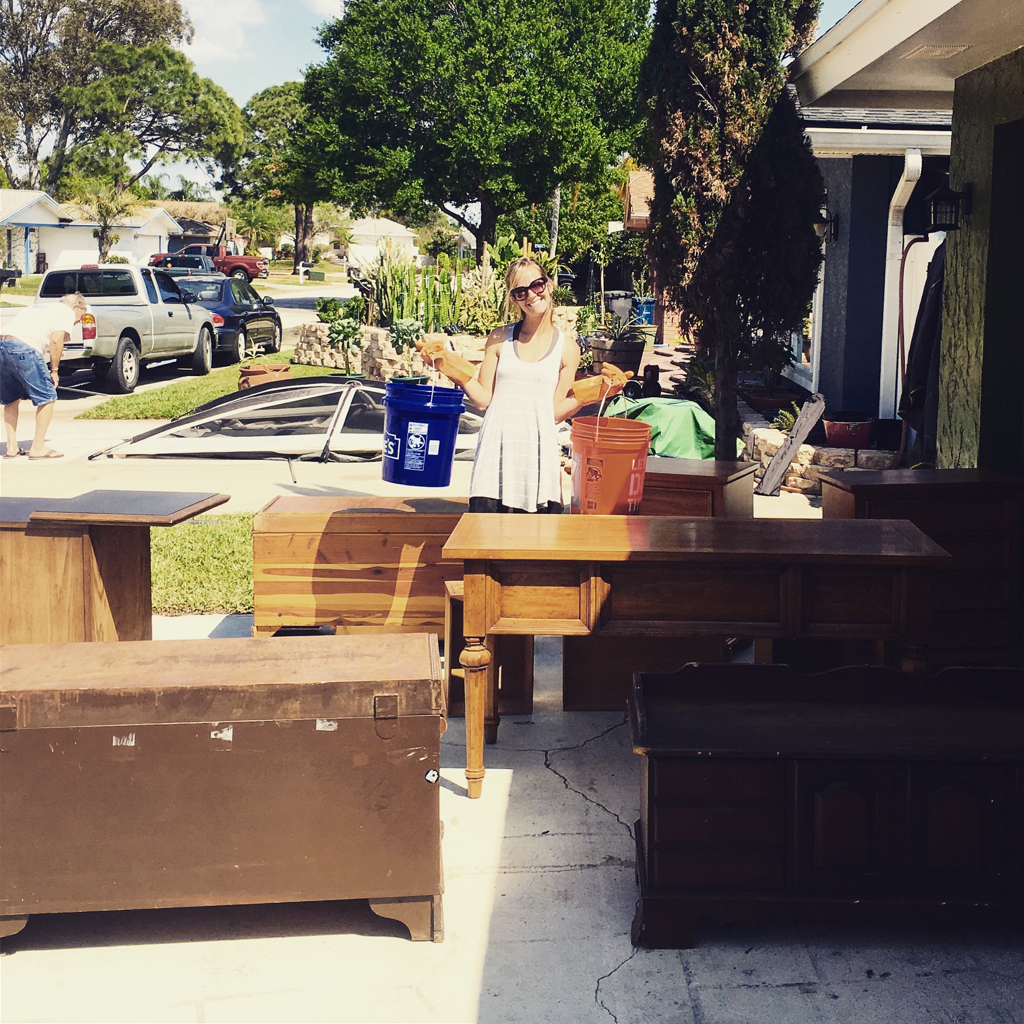
Recently I posted a picture on my Instagram and Facebook page where I was filthy, holding two buckets, and surrounded by awesome pieces of furniture from a weekend "haul". Usually I source all of pieces and we pick them up in one shot. I always find it easier to clean all of them together, patch them together, paint or stain them together, seal them together... you get the idea. This desk rehab I'm going to talk about today was one of the pieces in that sea of furniture!
Nate was picking up a bar cart for me from a super sweet woman down the street. She had a couple other pieces for sale and of course when he showed me this desk I fell in love. The turned legs, solid wood construction, dovetail drawers, gorgeous/ heavy duty Thomasville pulls and knobs... *starts to sweat*. This mother f**ker was coming home to mama's garage (that's a great idea for a horror movie).
We are a participant in the Amazon Services LLC Associates Program, an affiliate advertising program designed to provide a means for us to earn fees by linking to Amazon.com and affiliated sites. Steps: 1. Clean/ remove hardware: So the first order of business was to prep the desk. I've discussed my process for cleaning wood in other blogs so I won't go into detail here, but this piece was well kept so it wasn't as traumatizing as some of my other projects. By traumatizing I mean waking up in the middle of the night smacking non-existent-itch-causing dust particles off of your body that you washed three times. I also removed the hardware, putting the screws back in the hardware so I don't lose track of them. 2a. Strip: Not your clothes, your furniture (unless it's really hot out). This is another process I've talked a lot about because I end up doing it a lot (hehe). I apply a very tick layer of Citristrip to the furniture and let it sit for a couple of hours. Keep checking the furniture and any spots that look dry can get a fresh coating. When you're fairly certain the existing stain and varnish is lifted you can scrape with a metal spatula. Remove in the direction of the grain, and then wipe down with mineral spirits to get all of the goop off. This step will help you get a clearer picture of what's next. 2b. When there are a lot of nooks and crannies and turns and F*CK: This gorgeous piece of furniture happened to have a lot of detail. It's very easy to scrape gunk off with a spatula but it takes a lot of patience to get it out of the crevices and rounded surfaces. For these areas I used 0000 steel wool (fine, so as not to scratch the wood) and scrubbed the sh*t out of this sucker. You'll go through about four bags of steel wool, and you better wear thick gloves or you'll look like you were engaged in mortal combat with Edward Scissorhands. Forget going with the grain around here or you'll lose your mind before you're done with the first leg. This part is really important: if you leave old varnish/stain/citristip in the cracks and crevices they won't take stain. I wanted these parts of the furniture to accept more stain (for a rustic look), and the flat surfaces to be lighter. They make a cool tool, like a utility toothbrush, made out of nylon or steel depending on how hard or soft you need the bristles and this thing is very helpful for the hard to reach spots (and does more work than a toothbrush will). 3. Sand: Sometimes you'll need a few rounds of strippin' before you can actually see wood (oh boy). If the Citristip did the job the first time around and there are only a few funky spots I usually take my little mouse sander and gently remove any rough patches, or spots of stain. I like to have a smooth surface to work with before I start staining, and I've never had a problem with a piece not accepting the stain. The mouse sander I use is Black and Decker and rocks because it has a finger sander attachment and can get into little areas where others cannot. It's my spirit sander. Once the piece looks uniform you know you're done with the most annoying parts! 4. Wait: wait a day before you apply conditioner or stain. Your furniture piece will look different when it's totally dry the next day and you'll know if there are little areas you need to touch up. 5a. Stain: I apply a wood conditioner to the whole piece, wipe it off, and then stain right after. It helps the wood absorb the stain more evenly and avoids that horrible blotchy finish you read about on wood forums. I spend some major time at night on ye olde wood forum. I apply stain in small areas at a time. Depending on the wood, the piece will either soak up stain quickly or take forever. I'm not one for "test pieces" (which is why I've ruined my hair many times) but it's a good idea if you're not familiar with wood or how quickly different types absorb. Follow the directions on the can of stain (for this project I used Varathane Briarsmoke). I chose to use Rustoleum Varathane because their stains are usually very thick and I planned on "distressing" my desk using the stain. When wiping the stain off I wiped the desk almost naked with mineral spirits in certain areas and left excess stain on in others. I had never tried this before, and didn't know if it would actually work but I'm so happy with the result. All of the crevices appear darker, and the flat surfaces lighter (as if they were sun damaged). Crazy that I spent all of this time cleaning and stripping the desk only to make it look old again. The Golden Oak era look just wasn't what I wanted. BRIARSMOKE FOR LIFE and stuff. 5b. Hardware: While staining the piece of furniture your hardware can be drying! Paint it, clean it and give it a fresh top coat, or leave it be. For this project I spray painted the original hardware in a bright, light turquoise and then used antiquing dark glaze to give it that cool aged look. Baby wipes come in handy for making sure the glaze wipes off of the raised surfaces completely but stays in the recessed areas. I gave it a quick glossy spray with polyurethane and, viola! 6. Sand: When I've finished staining the piece of furniture, which isn't super duper easy if there are a lot of heavily detailed areas, I let it dry and then give it a light hand sanding with very fine grit sandpaper (220 and above). You always want a nice, smooth finish on a piece you've worked hard on so this is not the time to get lazy. 7. Seal: Brush on that Polyurethane Matte finish! I brush on very thin layers, and sand in between. The number of coats I do is dependent on the use of the piece, and how much I like my client. Just kidding! About the second part anyway. If it's a dining table, coffee table, etc. it needs at least four coats. Anything that is just for show can have the bare minimum. 8. Sand and reattach that hardware: Once the piece is totally dry, and the Poly has had 24 hrs to cure (few hours in between coats but a full day before any hard partying) do a final sand-job and reattach that super shiny, gorgeous hardware! I am so pleased with the way this piece came out, and I think I achieved the weathered, coastal vibe I was hoping for while still showing off the beauty of the wood and original hardware. Thanks for reading, and come back soon ya'll! If you liked this post, you'll love reading about this kitchen makeover and my DIY cedar chest makeover! Don't forget to follow us on Facebook and Instagram <3
This year has been both one of the best and worst of my life. Without going into too much detail, it's been a roller coaster. I'm sure many of you can sympathize and so I'm preaching to the choir when I say that sometimes you just need a DAAAAAAAAAAAAAMN break. That's right, I yelled 'damn' exactly how you read it, Eddie Murphy style. So when I felt like my symbolic tea kettle was about to overflow, I shut the burner off and let that water settle down. I'm not doing any one any favors if I'm too run down to be a good mother, too run down to produce the best pieces of furniture I can, too run down to write coherent blogs, too run down to be a good sibling, daughter, friend, etc. I'm no good to anyone if I'm in a "f**k off" coma because I took on too much, or was too many things to too many people.
So, with a mountain of work on my to-do list like a business to run, groceries to buy and dinners to cook, a home to clean, and a kid to bathe (sorry Vale, but you stink) I went to the beach. My sister was in town and instead of doing anything I was supposed to do we went to the mother freakin' beach. I got sand everywhere, I played with the kids, I drank a beer. It was magical, and it was what I needed to get my kettle bubblin' just right. Don't make that last sentence weird. The best part about going with my sister was that we actually got to have adult conversation that centered mostly around gossip (blah, blah, Kylie Jenner's face, blah blah) and not about anything serious. You know what's serious? Taking a break that is actually a break. You know when you need one, and you only get one life, which is fleeting at best, so drink the beer, eat the tacos, and take the breaks. All of the stuff I have to do will still be waiting for me but I'll be ready and happy to handle it, instead of mean mugging every person who dares to breathe in my general direction. I'd also like to add that I'm the luckiest mother/aunt in the world. Our kids just wanted to throw sand at people, chase birds, eat trash, and get their diapers filled up with beach stuff. And that's pretty awesome. Someday soon you'll get to read about furniture like you did in the olden days (last week). xoxo Gossip Girl Follow us on Facebook and Instagram <3 |
AlyssaMama to a beautiful and hysterical toddler. Owner of Young, Wild and Thrifty. Archives
May 2018
Categories |


 RSS Feed
