|
Hey!! I hope everyone is enjoying this insanely beautiful, Floridian weather! I sure am. My dear friend in PA Snapchatted a video of her backyard and there were golf ball sized snow flurries coming out of the sky. When I was able to stop laughing I really felt appreciative for dry heat, blue skies and bronzed skin. Something about snow in April really makes you want to hurl, AMIRIGHT? As usual, I've been a busy bee and basically spreading my self too thin for comfort. In my last blog I spoke about the bathroom remodel I was finishing with Mainstay Properties, and the other projects I was starting. Let's recap!
My friends Justin and Mia decided to do a few things to their home, including replacing some furniture, updating some features within their kitchen, and painting the kitchen/dining/living room walls. I'll be working with Mainstay Properties again on this job, and getting my hands dirty! Here are a few 'before' pictures of the main floor: The homeowners want to keep the kitchen cabinets, and because they are dark my thinking was to (1) lighten the wall color and add ship lap to a few key walls, (2) add some pulls to break up the darkness of the cabinets, (3) change the back splash to something simpler with a bit more shine to bounce some light around, (4) lower the bar to counter height and add ship lap on the bar back, and (5) replace the counter tops with something lighter and brighter. Before any of these decisions were made the homeowners purchased a new dinette set and decided they wanted to extend the cabinetry they had into the eat-in kitchen area. I proposed adding a china cabinet so they would have extra storage and save some money. We settled on finding the largest buffet possible, and placing shelves above it. A few things are happening to finish up the kitchen reno:
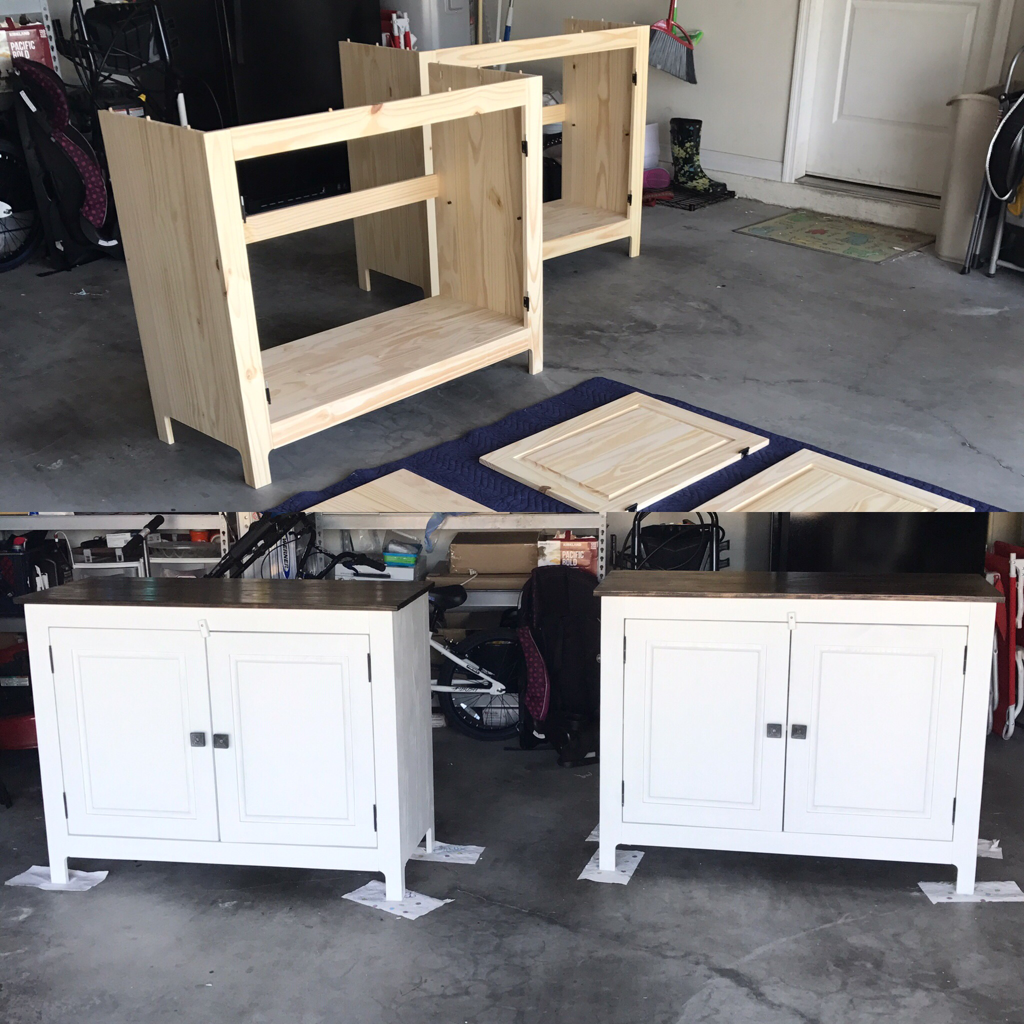
Stay tuned for a blog all about this reno and our design choices. In the meantime, I want to share with you how I turned some inexpensive cabinets from Joss & Main into rustic buffets! Here is the wall where the buffets will live: 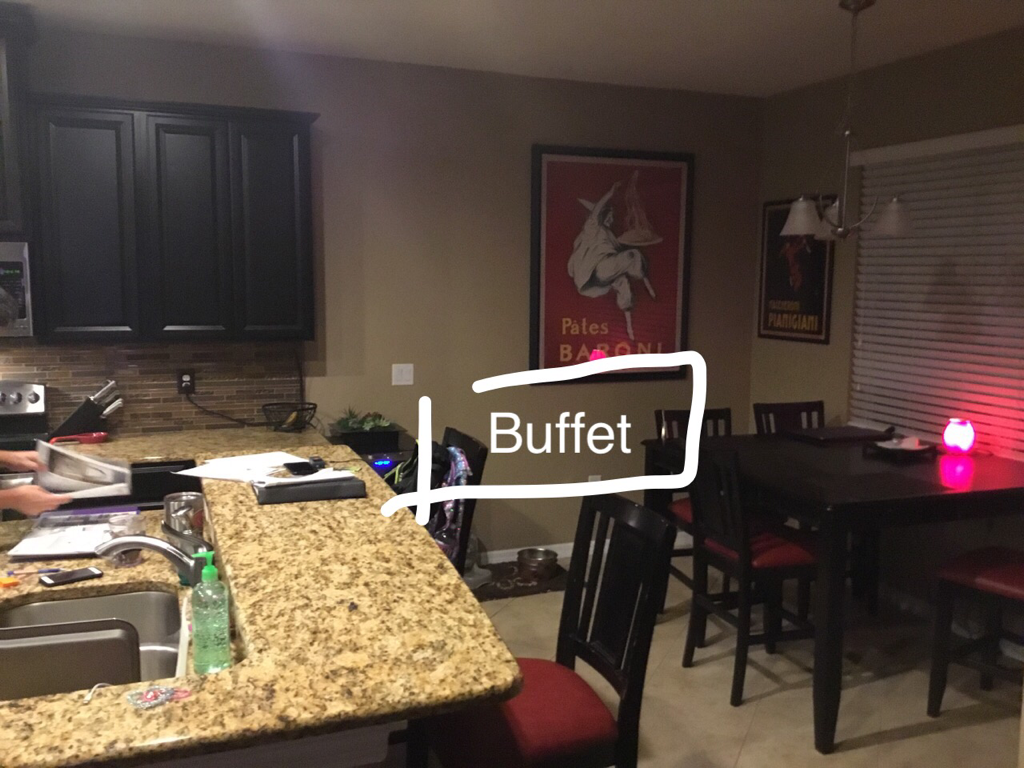 ' I don't want to give any renovation surprises away so I'm using only these old pictures! Try and use your imaginations (he he). The homeowners decided they wanted to incorporate their wine fridge into the design, so instead of connecting the two buffets we'll be putting them on either side of the mini-fridge. We'll have to play around with the shelves and decide whether or not to make one long shelf or two stacked on top of one another. The wall behind the buffets will be ship lap. The first step was to find a long enough buffet to look like an extension of the kitchen cabinets; this was next to impossible to do. They also wanted the buffet to be deep, and basically open so they could store larger items in it. Most of the buffets I could find were either too small, too shallow, or had small shelves for dishes. None of that was going to work for their needs, so instead I found an unfinished cabinet on Joss & Main (same one was on Wayfair for a few more bucks), 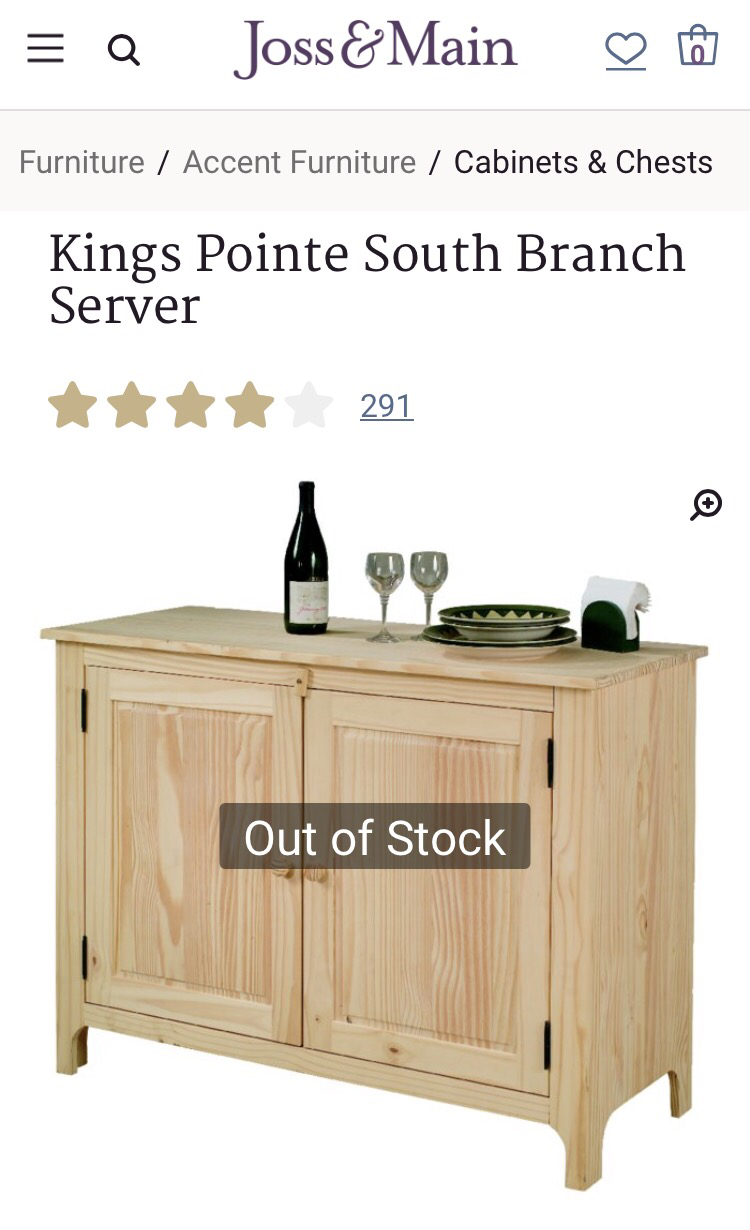 The plan was to stain the top, paint the base, and swap out the pulls for something cooler. They wanted a rustic look, so in order to show contrast when I distressed the piece I had to stain some of the edges that stuck out. You can see that process here: Because the piece was unfinished pine there was no prep work! It was so nice not having to strip or clean the furniture pieces.
When the paint and stain were all finished the guys put the buffets together for me while I chased my poor, attention starved child around the front yard. The grey knobs had super long screws, so those needed to be cut down in order for the doors to sit flush.
|
AlyssaMama to a beautiful and hysterical toddler. Owner of Young, Wild and Thrifty. Archives
May 2018
Categories |


 RSS Feed
